|
|
|
eXaminer® |
|
eXaminer® is based upon the same iXBRL/XBRL rendering engine used by the SEC, but offers file storage, technical validation, review/approval features and immediate feedback |

Contents
Welcome to the Donnelley Financial Solutions eXaminer®
Folder Creation Inside a Workspace
Folder Deletion Inside a Workspace
Uploading - Technical Validation Options
Downloading an iXBRL/XBRL File
Option to Return to Workspaces
Option to View XBRL Report Viewer
Option to View Validation Results
Option to Return to Workspaces
Option to Export to Excel, PDF or HTML
Option to View XBRL Validation Results
eXaminer Technical Specifications and Internet Security Settings
eXaminer®
Welcome to the Donnelley Financial Solutions eXaminer®
The Donnelley Financial Solutions eXaminer® is a comprehensive taxonomy and instance document review tool you can use to easily store, review and compare XBRL documents.
Manage XBRL documents in a centralized "workspace" and maintain direct access to US GAAP and US Mutual Fund taxonomies as well as any XBRL filing made to the U.S. Securities and Exchange Commission’s (SEC) Interactive Data filing programs.
Are you getting the most out of the Donnelley Financial Solutions eXaminer®? Contact us to learn more about the advanced features including:
· Non-XBRL file upload capabilities (comment files, Excel tagging files, etc.)
· Extension taxonomy and negated label review
· Comparability analysis between two sets of XBRL documents
· Calculation and detail reviews of tagged data
· Tag look-up and analysis (overall, by SIC)
URL: https://examiner.dfsco.com /ng/
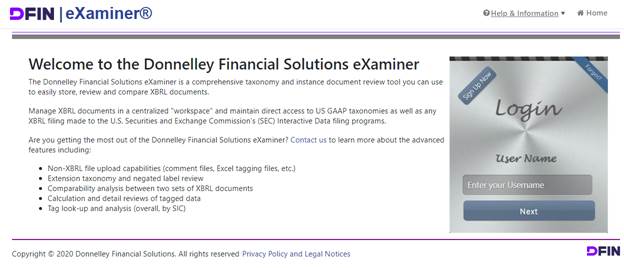
All stakeholders, as well as the DFIN XBRL business can access eXaminer® with their personal user ID and password. New users can select “Sign Up Now”, submit the required credentials and will be supplied with required ID and password.
Help & Information
Find eXaminer User Guides here and other useful DFIN support documents to understand better Frequently Asked Questions for iXBRL/XBRL.
Quick Start Video
eXaminer has been redesigned to make your document review easier and more efficient. This short video will help you get started.
![]()
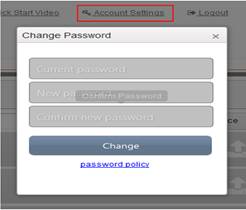
Account Settings
Users can change their Password here.
Sample iXBRL
On June 28, 2018, The SEC released its final rule regarding iXBRL. Beginning September 17th, 2020 Fund companies with net assets of $1 billion or more will be required to file iXBRL. All remaining fund companies will be required to file in three years. Donnelley Financial has tagged a sample risk return to illustrate what a risk return tagged using iXBRL could look like. Test drive the sample risk return here .
Workspaces
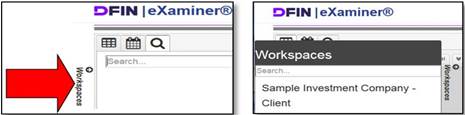
Along with the ID and password, eXaminer® will provide a personal Workspace. Once logged into eXaminer® you will arrive at your default personal Workspace.
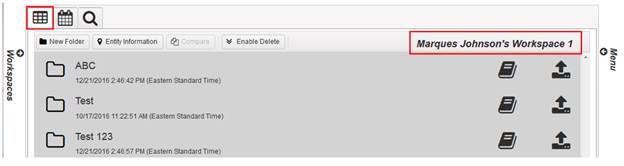
![]() From the
left slide out tab, click on "Workspaces", the slide out window named
“Workspaces” will display the Workspace names you have access to.
*Request access to Workspaces by contacting Customer Service.
From the
left slide out tab, click on "Workspaces", the slide out window named
“Workspaces” will display the Workspace names you have access to.
*Request access to Workspaces by contacting Customer Service.
Recent Files
The View allows you to see the 5 most recent zip files
uploaded by Date to the Selected Workspace. 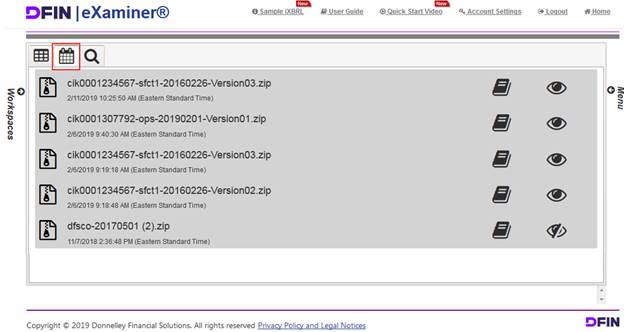
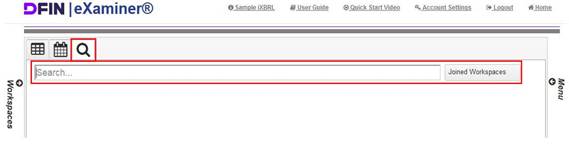
Search
The Search feature allows navigation directly to your XBRL. Search by filing date, job number or any identifier and eXaminer will populate your exact criteria.
Folder Creation Inside a Workspace
· Within your personal workspace you can create folders to organize your files.
·
Use the New Folder button

·
Provide a name for your folder and press OK.
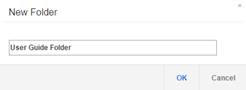
·
Your new folder will now appear in your workspace.
![]()
·
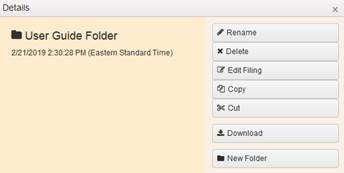
The Details button (book icon) and Upload button are now
available on this folder.
Clicking the Details button brings up various options and allows you to create
a sub folder.
· You may create as many subfolders as you wish to organize your files.
Folder Deletion Inside a Workspace
·
![]() To delete multiple folders
and files at the same time, users may select the Enable Delete option.
To delete multiple folders
and files at the same time, users may select the Enable Delete option. 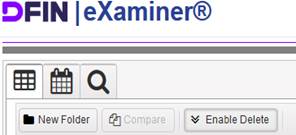
·
![]()
![]()
![]() When in use, Enable Delete
allows users to check off which files and folders to delete. Select Delete
to cancel all the folders/files selected. A confirmation to cancel box will
populte. Selecet Yes to delete all. Select Cancel allows a users
to exit the multi-delete screen.
When in use, Enable Delete
allows users to check off which files and folders to delete. Select Delete
to cancel all the folders/files selected. A confirmation to cancel box will
populte. Selecet Yes to delete all. Select Cancel allows a users
to exit the multi-delete screen. 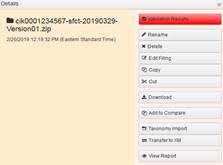
· To delete an individual folder or file users can select the Details icon of each folder/file the user wishes to delete. A Delete option will be available for each individual folder/file.
iXBRL/XBRL Uploads
Selecting a File
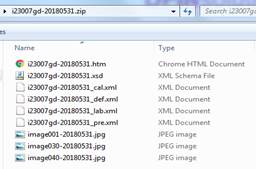
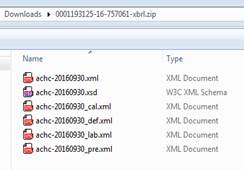
iXBRL files should be uploaded as an iXBRL ZIP package, containing the XHTML document, associated linkbases and if needed, images. XBRL files should be uploaded as an XBRL ZIP package, containing the instance document and associated linkbases.
 OR
OR 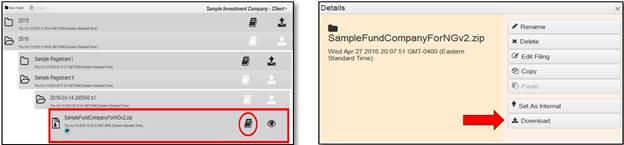
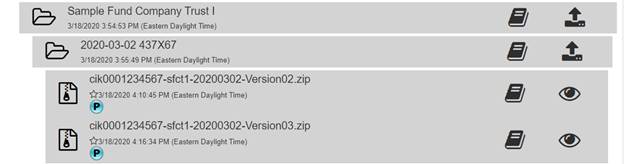
·
Once upload, the XBRL ZIP file is nested under the folder it was
uploaded to.
· Select the boxes which are highlighted and upload the extracted zip.
· Eluded
Uploading an iXBRL/XBRL File
Uploading - Technical Validation Options
eXaminer® offers three types of technical validation – SEC Mandate , XBRL 2.1 and Rendering Only . The selected validation will determine the extent that technical completeness of the XBRL files is checked during the upload process.
· SEC Mandate offers SEC EFM validation in addition to XBRL 2.1 schema validation. This validation should be used for all Investment Management Risk/Return-based XBRL documents.
· XBRL 2.1 offers a basic validation against the XBRL 2.1 Specification
· Rendering Only uploads the files for quick review (i.e., XBRL extension taxonomy not available for review; only report data can be reviewed).
Downloading an iXBRL/XBRL File
If you need to share the XBRL exhibit you can download directly from the workspace. Choose the workspace and then search or navigate to the job folder and zip file. Once you have opened the job folder, from the zip file select the Details icon. From the pop up Details box select Download.
View an iXBRL File
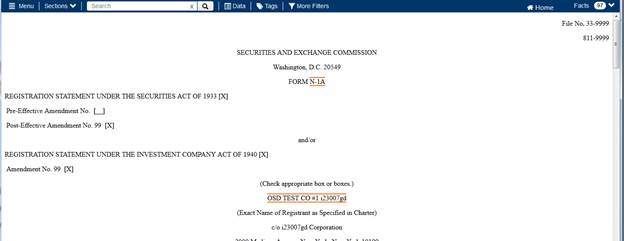
After uploading an iXBRL zip file, the Inline XBRL viewer will be available immediately after uploading. Click the View Report button to open the Inline XBRL viewer window as soon as it becomes enabled/clickable. With this feature, when a user uploads and views a filing submitted with Inline XBRL on EDGAR, the user will be able to see tags and the related XBRL data while viewing the HTML filing.
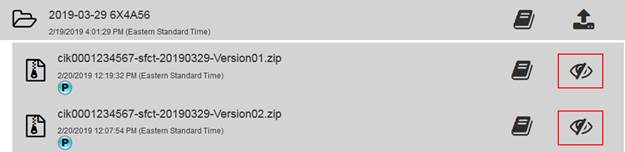
Navigating a Workspace to view an iXBRL is an option too, simply click on the Eye Icon with a line crossing through it.
eXaminer® inline XBRL Viewer

Option to Return to Workspaces
On the top right-side of the Inline Viewer there is a Home (button)

![]() which
will return users to the Workspace where the iXBRL file originated from.
which
will return users to the Workspace where the iXBRL file originated from.
Option to View XBRL Report Viewer
From the ![]() drop down users
will select View XBRL Report to view the traditional XBRL
rendering.
drop down users
will select View XBRL Report to view the traditional XBRL
rendering.
Option to View Validation Results
From the ![]() drop down users
will select View Validation Result to confirm SEC testing results.
drop down users
will select View Validation Result to confirm SEC testing results.
Option to Print HTML
From the ![]() drop down users
will select Print to have the ability to have a hard copy option
for the inline XBRL rendering.
drop down users
will select Print to have the ability to have a hard copy option
for the inline XBRL rendering.
View an XBRL File
There are two ways to view XBRL files that have been uploaded to eXaminer®. The first way is immediately after uploading an XBRL zip file. The second way is to open already-uploaded XBRL zip file from My Workspaces.
To view XBRL files immediately after upload via the Upload Documents window:
1. Upload an XBRL zip file
2. Click the View Report button to open the review window as soon as it becomes enabled/clickable
To view uploaded files from the My Workspaces slide out:
· Open the Workspace/folder/sub-folder where the XBRL zip file has been previously uploaded
· Select View (Eye icon) to open the document review window.

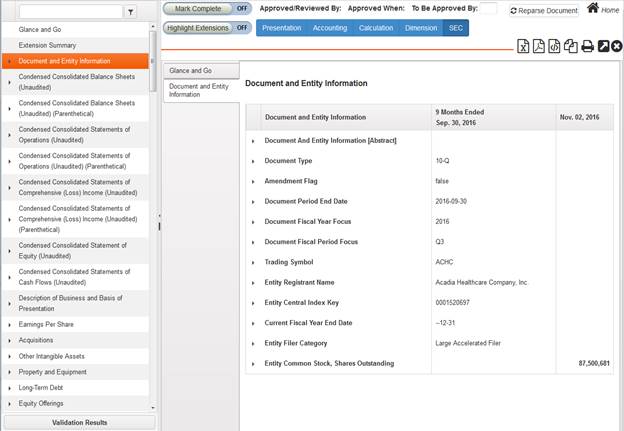
eXaminer® XBRL Report Viewer
The left-most pane of the Report Viewer shows all available report sections in this XBRL filing, as well as some useful meta reports, such as the All Reports option at the bottom of the list. An option to view All Reports Detail Data or Summary sections are available as well. This left-most pane can be expanded/hidden for a more focused review. A search filter is available to identify specific reports sections.
The middle tab shows a list of Open report sections. You can open one or more report sections then hide the left-most pain to keep the shorter list of report sections for immediate review.
The full report section list can also be searched/filtered to identify a specific section in documents where there may be dozens or hundreds of report sections.
Option to Return to Workspaces
On the top right-side of the Report Viewer there is a Home (button)
![]() which will return users to the Workspace where
the XBRL file originated from.
which will return users to the Workspace where
the XBRL file originated from.
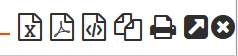
Option to Export to Excel, PDF or HTML
On the right-side of the Report Section view are seven buttons.
- Download Excel: This will create an Excel of the current report section and view for download.
- Download PDF: This will create a PDF of the current report section and view for download.
- Download HTML: This will create an HTML of the current report section and view for download.
- Multi Export: To export multiple reports as Excel, PDF or HTML for download and review. Note: Using the All Reports meta-report will allow you to retrieve all sections as one file. This option allows you to export a subset of the reports.
- Print Icon: Print the selected tab.
- Pop-out Icon: Open the current report section view in a new browser tab.
- (X) - Remove displayed tab. This will remove the report section from your quick list (middle pane). Users can always re-open from the full report section list.
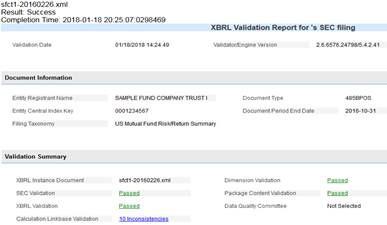
Option to View XBRL Validation Results
· Like file storage, examiner helps us in validating all the XBRL files. Any file which is incomplete or incorrect in terms of validation requirements will flag errors by giving hints about where and what are the errors. Validation steps are below.
· Once a dedicated folder is ready, upload the zip by selecting SEC Mandate option.
· View report and View validation report will provide the SEC view and guide us on the errors on the files respectively. Below is an example of the Validation Results.
Utilities
Compare XBRL files
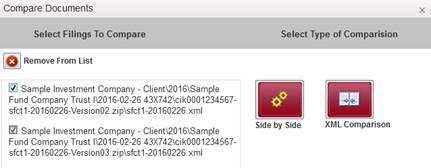
'Compare Documents': The application should open the Compare Documents Window with two types of comparison options:
1. Side by Side
2. XML Comparison
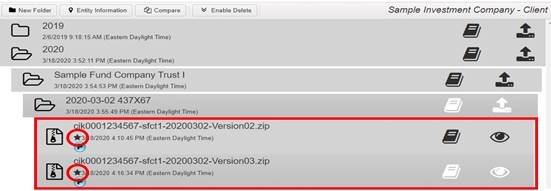
- From the Workspace view, navigate to a job folder to Compare two zip files.
- Select/Highlight the Star icon next to the Zip File icons. This adds a file to the Compare tool.
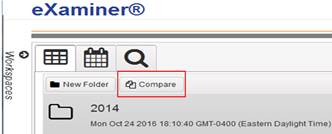
- Select the Compare button:
- Select the files by checking the box in front of the files you wish to compare:
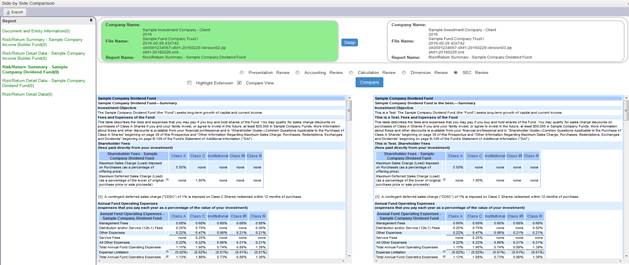
Side By Side: This will bring a pop-up window with a title "Side by Side Comparison". One can view both the documents side by side to compare the reports.
We can view both the documents side by side in Reports window.
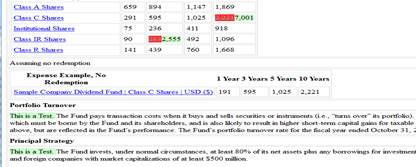
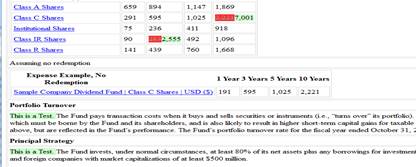
Select Compare: Pop up New HTML page and will show difference between the two selected reports. RED coloring with strikethrough indicates deleted text and GREEN coloring indicates added text.
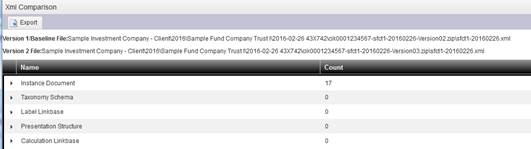
XML Comparison: This will bring a pop-up window with a title "XML Comparison". This comparison result provides differences between the data in each linkbase file.
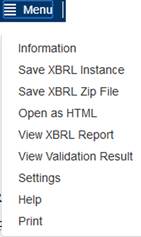
Public Documents Menu
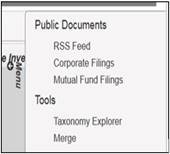
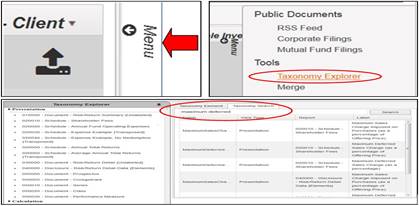
From the Right Slide out tab, select “Menu.” This contains Public documents and Tools.
![]()

This will show the slide out menu with "Corporate Filings" and "Mutual Fund Filings". This tab helps us in viewing the recent SEC interactive data filing irrespective of who has done the XBRL. While viewing funds of the SEC database all the functionality of the eXaminer® will be available.
Corporate Filings: Able to view the Corporate Filings window
Mutual Fund Filings: Able to view the Mutual Fund Filings window
Taxonomy Explorer
Search the Taxonomy: Checking to see if an element was used correctly? Want to know the definition of an element? Not sure what elements are available for your specific disclosure item? From the home page choose “Menu” from the right slide out. Tools >> Taxonomy Explorer >> SEC >> Risk/Return 2018. You can search by words or phrase. The search will show all elements with the words in the label or definition. Choose the element you wish to view and another tab will open with the details of the element.
eXaminer Technical Specifications and Internet Security Settings
If you are
having trouble when exporting your XBRL to Excel, PDF or HTML, you will need to
make Donnelley Financial Solutions eXaminer a “Trusted Site” in your internet
options.
The following details how to establish eXaminer as a trusted site within
Microsoft Internet Explorer:
1. Open Internet Explorer
2. Go to Tools | Internet Options
3. Click on the Security tab.
4. Choose Trusted sites (green checkmark) in the white box, and then click the Sites button
5. At the bottom of the page, make sure to uncheck the box next to Require server verification (https:) for all sites in this zone
6. In the first field labeled Add this website to the zone, type in https://examiner.dfsco.com/ng/ and click the Add button.
7. Click Close.
8. With Trusted sites still selected on the Security tab, click the Custom level… button.
9. Scroll down to the Downloads section.
10. Choose Enable for Automatic prompting for file downloads .
11. Choose Enable for File download .
12. Choose Enable for Font download .
13. Click OK at the bottom of the Security Settings | Trusted Sites Zone window.
14. Click OK at the bottom of the Internet Options window.
Restart the Browser (you will only have to do this right after you update the settings).